Friday, December 26, 2014

"Tink."

"Tink." Generally when you hear it, it is up at the higher edge of the hearing spectrum, as compared to, say, "Thud." being all low and bass and flat. Now we are all aware that "Thud." quite often has rather negative notations, usually ending in the coyote being squashed flat, or perhaps, the more thrilling version-

 "911 Dispatch. What is your emergency?"
"Oh dear, my foot slid off the brake, then "Thud," over on their sides went about about 30 Harleys.....

"Tink" is quite the opposite, yet often with the exact same results as "Thud." It can be an almost pleasant sound, like the delicate "Tap" of a spoon to a glass, or perhaps as melodic as a teeny tiny bell going "Ting".  I've dealt with a couple of  "Tinks" in the past, and have decided to base this part of the build on the "Tink" principle.
     Take, as an example, the time that big hunk of metal decided that it was no longer going to continue doing it's simple task of going round and round, and  also decided to part ways with the rest of the van. At some point, one certain spot on that axle made a little "Tink", and that was that. It was hilarious to see the right rear wheel go cruising on by me, and quite a rush getting to do the mid-air-rolling-about-in-the-van-in-realllllllll-slow-motion. I think I finally stopped enjoying this heavy metal trip after I got thrown out, picked myself up, then waited for the police to arrive, (all the while happily blocking two lanes of an interstate, "cuz how many times have you gotten the chance to block traffic on an Interstate for a couple of hours, and nobody CAN really blame ya ?) Things finally get towed,  then one of the cops decided to write me and my poor ex-van a ticket: ..........Driving A Defective Vehicle! (Really, Your Honour? Do you actually think I was gonna drive something THAT defective if I already knew about it?)

That's one "Tink" that can getcha', for the motorcycle, this is just as bad. This one comes from just behind the exhaust pipe and up near the front of the motor. Usually it is heard when one is about three paces away from the motorcycle, after just pulling to a stop and parking it on the sidestand. This little "Tink", often times results in wild screaming, throwing of inatimate objects, looking over at the dog and thinking of throwing it while you're wildly screaming, and other such unhappy behaiviour. To help avoid the "Tink" principle, (by the way. that's actually pretty easy in my case because some previous person with a saw cut off the sidestand lug, and now there just ain't nothing to go "Tink." anyway...), so I decided to make something that probably won't go "Tink" for quite some time. Yes, once again I had to hunt down my caveman garb so that I can use the firestick and get that really big hunk of metal bent. After being bent to the right angle, I went ahead and took it out of the vice, dropped it on the ground swearing at how I'd burnt my hand, then waited a day or two and fitted and drilled the hole for the sidestand pivot bolt.

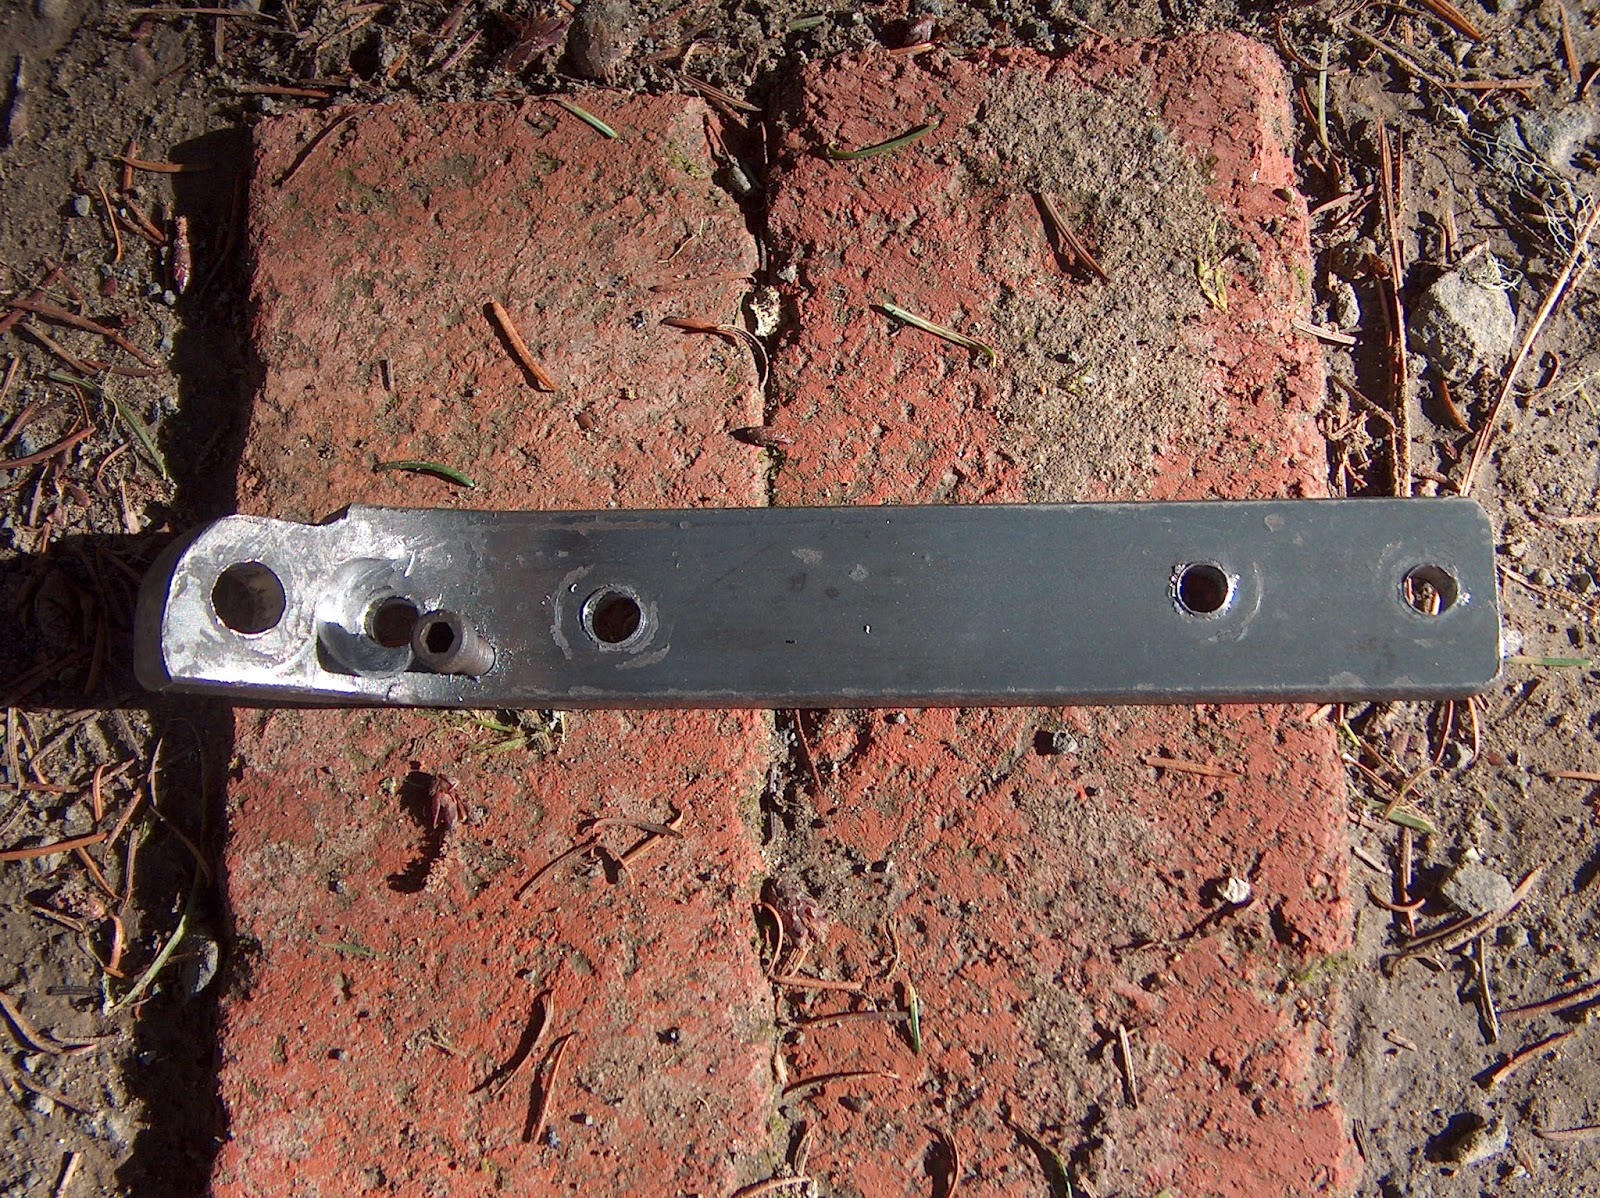
Next was getting at least one set of U-bolt holes drilled in about the right spot, then doing the other side even closer to the right spot, meaning that I was a bit out and had to work a little file magic. The underside of one U-bolt hole was countersunk to provide both a flat surface and a spot for a "Tink' to develop in a lonnnnnnggggg time from now. I also drilled and tapped a 1/4 hole for an allen head for the return spring.

I'm still going to play with the return spring and a couple of dots of welding at certain points to ensure their stopping at the right point, because it's just as embarrasing to put bike on the sidestand (or so I thought), have it roll back a couple of inches,  then just fall over like a dead horse.... This one is going to have just a little more fine tuning.
      It also has several good advantages: Not prone to breaking, it supports the whole underside, and can also give a nice place to shove a jack to lift up the front end. If extra long U-bolts are used, it makes a great spot to mount a fairing lower, or, as I'm thinking of doing, an ACIMS from the early 70's. Finally, if one is truly forced to be in survivalist mode, The bike can be leaned up against a tree and with the deft removal of 4 little 1/2" nuts, it can rapidly leave them with a most excellent rabbit hunting device.


Sunday, December 21, 2014

It's Waterfall Season!

It also comes with creeks and flood watch and big waves and ..........


Like the wild mushrooms that draw a brief reenactment each year of the far gone hippy days of the '60s,("Far out, man, I just scored a purple haze".....), waterfall season is upon us! Local legend has it that if one of the ancient ones had a bad event happen in their lives, such a a really bad day at poker, their heartfelt sadness as losing would cause them to cry. Their tears fell to the earth, breaking into particles small enough to withstand hitting it- a thing called rain. If they were really sad or had lost lots of money at poker, it would cause more tears to fall, and more rain. As the rain ran off, it would hit the ocean with such a force that waves would be crashing everywhere.

Naturally, this left the local natives a wee bit worried after they had 3 or 4 good days of rain. So after murdering a couple of innocent chickens and lots of probably pretty wild dancing, if they got lucky and made the gods happy, the next day was kinda' like this:


Unfortunately, if one didn't quite do the chicken sacrifice thingie quite right, then the wicked creature of the sea would rise up from the greatest depths of the ocean and swallow the  great glowing orb in the sky, taking it off to the realm below the waves.


As darkness descended upon the land, well, I guess it was just time to do the chicken killin' thing again; then see what the next morning brings!
  ( For those of you still reading, it was actually just 24 hours in Northern California at the tail end of a good rain. Many new waterfalls to hunt for, and happily lots of new green things poking out of the ground..  And it only took me about 20 minutes to come up with that chicken story.............)


Sunday, December 14, 2014

Ogg Make Thing With Firestick.

Ogg like fire, Ogg like firestick. Ogg make firestick work last week. Ogg use firestick, make thing for motorcycle. Ogg Happy!


I needed a rack for the bike to hold the saddlebags, as well as supply a way to mount the rear fender to the bike. The closest thing I've found is a rack from an old military Triumph TRW, and it's about as easy finding one as it is pulling a rabbit out of a hat. So I went down to my local firestick store, got the acetylene and oygen tanks filled, grabbed some tubing and a little firestick rod, and went at it. Got a good rough start happening, first I took some measurements and played with locating funky bends. I cut a few pieces to length, then the firestick was used to bend the tubing to about where I needed it bent. A few tack welds were done, giving me the thing you see here.

A few words of inspiration for those who are going, "Golly, I wish I could do that!" Well, buddy, you can. See, my current welding skills would have resulted in the Exxon Valdez incident looking like a spilled cup of coffee compared to the damage I would have wrought if I were working on an oil pipeline.


Notice the use of the word "current". I still have a lot to get re-acquainted with in the world of using the firestick, but that doesn't bother me. My welds look like shit today, but with a little...er.....lots of practice, they won't. Before another weld gets done on the rack, I'm going to cut several little itty bitty pieces of tubing, and spend some time getting it together and making things look and hold together nicely. Yep, I'm gonna' PRACTICE doing it right until I can, THEN I'll go gonzo on the actual rack.


Not just the rack, but tabs for holding the exhaust and other little goodies to the bike will need to be made. The brackets I'll have to make to attach the Lycett seat to the frame will give me lots of practice using the firestick to make clean bends, and I'll even make one of those groovy bolt on sidestand bases out of some seriously thick metal. Yep, Ogg has practice to do, but Ogg will make lots of things with firestick!!!


Friday, December 12, 2014

Dodged That Bullet

Ah, the joys of country living! The past two days were supposed to be spent playing with lots of fire, metal tubing, and a hammer, but Mother Nature decided that things were not to be so. She put a damper on the fire routine with her own water spigot, repositioning my efforts in the direction of getting things picked up from the lower zone and moving them to the upper zone. To help further ensure there was a bit of chaos, at 12 hours til "Move 'Em Or Flood," it was time to fire up the neighbors RV for the pull out, (Umm, not the one in this photo, a different one not pictured....). That went well with the aid of the battery charger and the jump from the truck- that is until we discovered the recently swiss cheesed hoses the nest of mouses decided to build in the dude's engine compartment. Two or three spliced water hoses later, and things were finally ready to rock. (Mental note: THIS is why ya fire the engine once a week- it seems that little mouses don't like their nest heated to engine temp at least once every couple of weeks, so they find a different home with other groovy little hoses and wires to chew on!)


A long two days- lotta good people down here- the ones that could gave help, the ones that needed accepted it, and all worked out this time around.Time for a glass, and a little celebratory "It Didn't Flood" drink! (Now maybe I can get my bloomin' torches out, and start playing with fire again!)

What's better than a glass of wine and a fire after the rain and prep work ends? Only this is needed to complete the cycle:

https://www.youtube.com/watch?v=XzqzFExGp10

Tuesday, December 9, 2014

An Encownter With Al Cowda........

I decided to go out undercover today- in the white Ranger. Although I had no clue as to what the trip would bring, I discovered the scouts for Al Cowda- our local terrifying bovine thugs- and got photographic evidence of it!

But the journey must begin somewhere......

As it has been wet, things have sprouted, in many various shapes and colours and sizes:


 My path took me through the enchanted bits of forests, passing what appears to be a reconstruction of an early Russian guard tower here on the California coast. The construction is very simple and, well, it's just large, big fat boards and posts, it is built in the same style as nearby Fort Ross, an early Russian post.


As I left the Fort Ross area, I entered the cow zone. Their souls trapped forever in this unending misty zone, trapped indeed by mere rails of steel, they lie in wait for the errant car driver or motorcycle rider......


Now these aren't no average cows. These are members of the dreaded Al Cowda, and they do their dirty work with the precision of a well tuned guitar. We've passed each other a lot, their arrogant sneers hardly masking their contempt as I ride by wearing full leathers, and I've seen them at work. Using deer and squirrels and raccoons as their minions, they try to thwart the unwary traveler by staging roadblocks and suicide ramming attacks. A well coordinated lot, they are hard to identify as they blend in seamlessly with the local bovine population.


That cow zone is an area best traversed with a watchful eye, for the evil Al Cowda will get you if they can!!!

Oh yeah, I also played "Ogg Make Thing With Fire" later on in the evening.....


Now that should be a right proper luggage rack when I'm finished!

Monday, December 8, 2014

Let There Be Light!

Thus, Abraham begat Isaac, who in turn begat......oops, wait a minute, wrong book.........Uh, let's see, we're talking motorcycles right?

Taking a break from playing with rear frame sections, it was fun to play with that tail light I'm making. First, most of the grunge was scraped off, giving a slightly cleaner appearance. The red glass lens arrived from E-bay...(Gawd, how I detest a PLASTIC lens!), and the cat's expertise was called into play. Needing an outer ring to help hold the glass in place, little Fluffy was more than willing to contribute her fair share of work, and promptly devoured a can of cat food, leaving me with an empty can.


From this can, a nice ring was cut to act as a retaining plate for the lens, both held in by a wire clip.


The almost finished tail light, still needing a bit of electrical stuff.


I went to my local junk store, and craftily stated that I needed the guts out of a tail light, ya know, kinda' like the ones ya find on a boat trailer. (I say craftily, as had I stated that I was "repurposing it" or "up-cycling it", that probably would have doubled the price. Hey, guts are a lot cheaper than up-cycling.....) The aforementioned guts were removed, reshaped, stamped, bent, and mangled to get them to cram inside this little itty bitty tail light. But guess what? It WORKS!!!!!!    Yippeeeeeeeeeeeeeeeeeeeee!!!!


Now all it needs is a bit of paint, and an approximately 80 year old lamp is back on the road!!!!!


Friday, December 5, 2014

Ohmigawd, What Have I Done???

Oh no! There's only HALF a motorcycle in the shed!!!


But let's back it up a step or two, o.k.?  With the original hardtail rear section on, a couple of 4 x 4's were shoved under the front half after the pipes and mufflers were removed. This gave the rear wheel about two inches clearance off the ground, and a little bit of wiggle room to remove the rear wheel.


I took the opportunity to compare the new 0" drop, 0" stretched section to the one still in place by positioning the two side by side with close to identical mounting points. (This is how I figured that the original hardtail was 2" drop, 0" stretch. ) For those of you wanting to learn, it ain't too hard. Let's start with stretch- it's just that. A zero inch stretch will give you the same wheelbase as stock, providing you haven't massacred a good frame and raked the neck or extended the front end. A 4" stretch-well, you get the picture, that'll make it four inches longer, and is usually done to give a chopper look, as well as supply more space to mount a battery box and oil tank.
   As for drop, it's a bit trickier to understand. No matter what, if you are still running a 4.00 x 18" tire, your axle center is going to sit at about 13" off the ground. However, if you run a 2" drop frame, the frame section is made in a jig that changes the frames shape and angles, leaving the axle center still at the 13" mark, but lowering the frame 2". Point being, when shopping for a hardtail, the amount of drop is lowering the frame AT THE REAR AXLE PLATE MOUNTING vs. THE REAR FRAME CONSTRUCTION. This will change the look of the frame, with different angles than a 0" drop would have. It will also leave your engine sitting higher in the front than at the back--to maintain level with a 2" drop rear hardtail, you would also need to shorten the stock fork tubes by about 2"........

Here we see the 0"drop, 0" stretch in the foreground, background with fender is 2" drop, 0" stretch.


With the wheel and fender removed, I had a clear look from the rear at the oil tank, and will be moving it outward an inch or so, that will give me more room for mounting coils next to the oil tank. Just under the oil lines extending over to the chain will permit a plate to be welded to make a nice base for the battery box.


At this point, the original rear section was removed, leaving me with half a motorcycle. This simply would not do, so the new 0" drop 0"stretch section was bolted into place. A nice piece, it almost aligned itself with the front frame mounting holes with no problem! The rear wheel was put back on, and lo and behold, even on the 2 pieces of 4x4, it now sat on the ground, whereas the old frame section had the wheel 2" off the ground on these same 4x4 pieces. I just gained about 2 inches of ground clearance, and now the engine will sit level like it should!!!

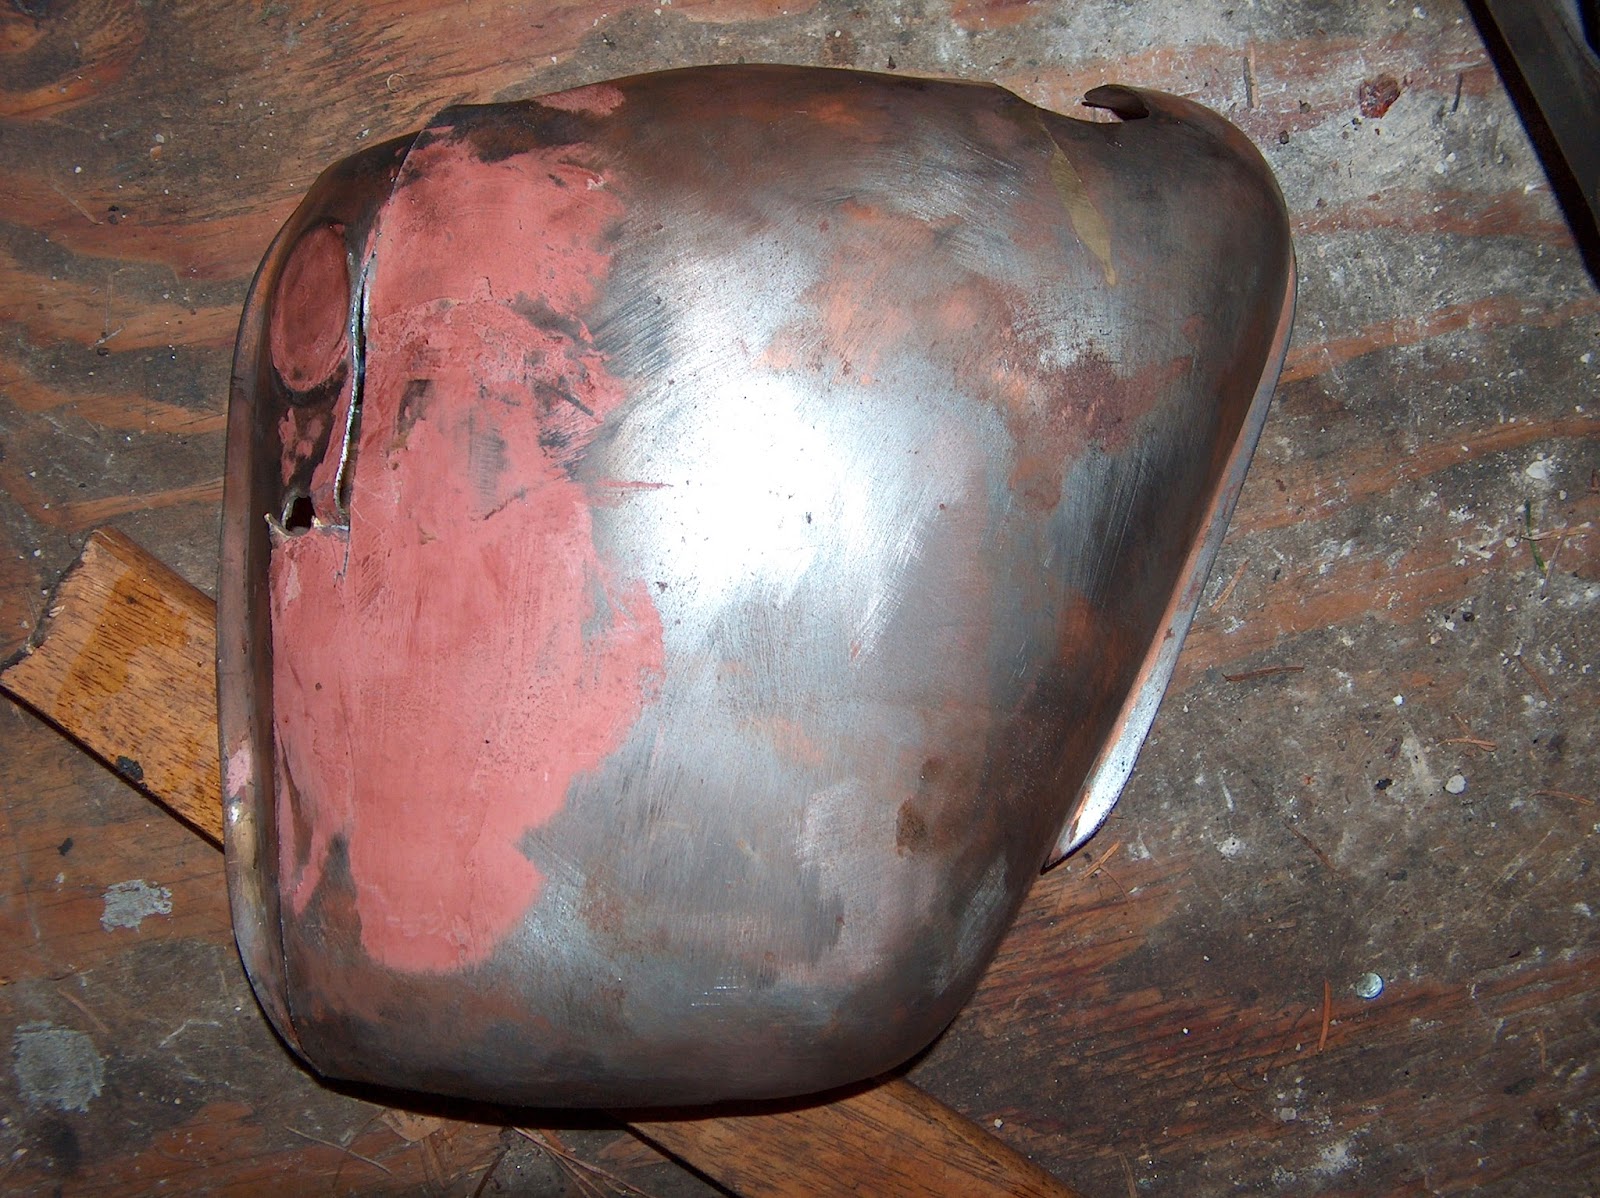
Now comes the fun part, taking care of the details. Tabs will need to be made for things like oil tank relocation, exhaust pipe and muffler location points, fitting the Lycett solo seat, and a rear rack/saddlebag mount. Oh, I did play just a hair....I found this fairly trashed sidecover:


and with a little bit of hacksaw power, started the conversion into this rigid frame side cover instead.....


Of course, a little more shaping is in order....

That's it for tonight! Next time it's onto tabs and oil tank and the rear rack, which will not only hold saddlebags but also be some of the rear fender support.